
After the Windows 10 update, the incredible features and the errors and issues come hand in hand. The users have reported yet another issue called “high CPU usage” after the update. If your system is stuck on an issue like this then you should not neglect it. The usage of CPU or RAM can go from 98% to about 100% after the update, and mostly we feel that it is due to no apparent reason. But there are varied causes of this error, and since we are aware of the possible reasons, you can easily fix it. The error affects the performance of your PC/ laptop as a result of which it freezes, crashes and runs slowly. So it is important that you resolve the error as soon as possible. Check out this article to know how to fix high CPU usage after Windows 10 update.
Causes of High CPU Usage after Windows 10 Update
There are certain programs that lead to the high disk, RAM, CPU or memory usage of your system. And so before we move on to the methods to resolve the error, have a look at the few reasons that is probably causing it.
Recommended: Fix Windows 10 Microsoft Compatibility Telementary High Disk Usage
How to Fix High CPU Usage after Windows 10 Update
- Memory leak of Windows 10 after the update.
- Driver Incompatibility issues
- Background Task Infrastructure Service
- Redundant Startup applications
- Windows Spotlight
- Other causes
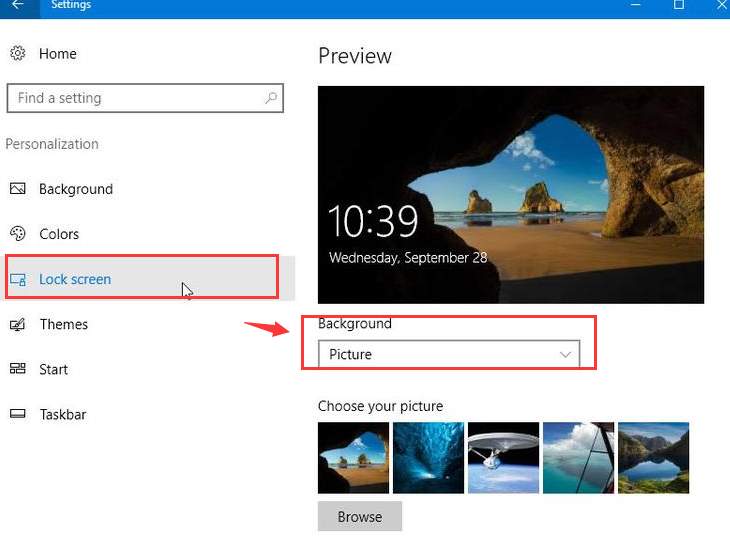
Method I- Modify Lock Screen Background
The background services is a major cause of the problems associated with CPU. And so try to disable the service, and recheck if the error persists.
Step 1: Click on the Start option. Then select Settings.
Step 2: In the Settings pane click on Personalization.

Step 3: Now locate Lock Screen option on the left-hand side of the window. Then on the right side, click on the Background category. From the drop-down list of this option, choose Picture.
After modifying the background of the lock screen, you still face the High disk sage issue, try the next method.
Method II- Modify Settings through Registry Editor
The net method requires you to change the settings of your system through the Registry Editor. But before you go ahead with this method, make sure that you have backed up all your important data stores on the system.
Step 1: Open the run window by pressing the Windows icon key +R simultaneously and then type regedit in it. Hit the Enter key.

Step 2: You will be asked for the Administrator permission. Click on Yes option.

Step 3: Next follow the given path-
HKEY_LOCAL_MACHINE>SYSTEM>CurrentControlSet>Servcies>TimeBroker

Step 4: Locate the Start option on the right hand side, right click on it. Then click on Modify option.

Step 5: Now change the value data from 0 to 4. Save the changes by clicking on the Ok option.

That’s it. Though this method is not suitable for the Cortana users as some features are affected by it. If this method doesn’t sound appropriate to you, hop on to the next one.
Method III- Disable Superfetch Services
The Superfetch services also happen to be a probable cause of the high disk/ CPU usage on Windows 10 after Fall Creators Update. So follow the instructions to disable these services.
Step 1: In the search box type cmd.exe.
Step 2: On the Command Prompt option, right click. Then choose Run as administrator.
Step 3: When the prompt UAC window displays, click on Yes.
Step 4: Now type the following command in the black window and press Enter.
“net.exe stop Superfetch”
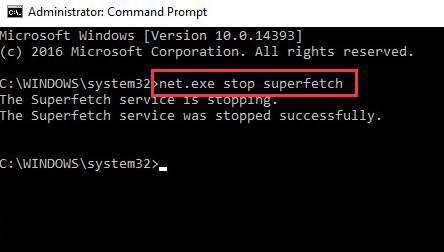
The services will be stopped within a few minutes. This was another tried and tested method to fix the CPU usage issue.
Method IV- Disable the Startup Services
The startup services also lead to the sluggish performance of the system. So disable the fast startup, with the following instructions.
Step 1: Follow the given route- Start >> Control Panel>> Power Options.
Step 2: Then click on the Choose what power button does option.
Step 3: Now select Change settings that are currently unavailable. Here uncheck the checkbox for the Turn on fast startup option.
Step 4: Click on Save changes option to apply the changes made.
The following tricks can also help you make some more space on your CPU and speed it up.
Step 1: Open the Task Manager by pressing the Windows icon key+ R together. Then type msconfig and press Enter.
Step 2: Now click on the Startup tab. You will observe a list of programs and services that run at startup.
Step 3: From here you will be able to disable the programs that you don’t need to run at startup.
If any of the above methods don’t work for you, then you can try to update the drivers that are missing, outdated or incompatible with the new, updated version of your Windows OS.
We hope guys that now you will be able to fix High CPU usage after Windows 10 update. The error is not that difficult to debug, but of you still face any problem, leave your query in the comment section.